- 環境
- インストール準備
- MySQLインストール
- DefectDojo操作用ユーザーアカウント作成
- Virtualenvの有効化
- インストール(django-DefectDojo)
- 起動準備のためのインストール
- DefectDojo起動
- NGINX連携
- ブラウザでアクセス確認
※dockerバージョンでインストールを行うが正常に動かなかったため、個別手順によるインストールを実施してみたら問題なく動いたが何かレイアウトが変だ。
環境
ubuntu16.04.3
CentOSでのインストールはうまいこと動かない。インストールで使用するシェルをcentOS用に修正が必要。
インストール準備
各種パッケージインストール
■実施
user@ubuntu:~$ sudo apt-get install -y git
user@ubuntu:~$ sudo apt-get install -y wget
user@ubuntu:~$ sudo apt-get install -y python-pip
user@ubuntu:~$ sudo apt-get install -y python3-pip
#pyrhon3-pipは不要かも
yarnのインストール
※未インストールならセットアップは完了するがパーミッションエラーやGUI表示で不完全となる
user@ubuntu:~$ curl -sS https://dl.yarnpkg.com/debian/pubkey.gpg | sudo apt-key add -
user@ubuntu:~$ echo "deb https://dl.yarnpkg.com/debian/ stable main" | sudo tee /etc/ap t/sources.list.d/yarn.list
user@ubuntu:~$ sudo apt-get update && sudo apt-get install yarn
(参考)https://yarnpkg.com/lang/ja/docs/install/#linux-tab
#appstreamcliの修正対応
※後述する setup.bash実施時にBacktraceなどで発生する場合に対応が必要
*** Error in `appstreamcli': double free or corruption (fasttop): 0x0000000001c44cb0 ***
======= Backtrace: =========
/lib/x86_64-linux-gnu/libc.so.6(+0x77725)[0x7fa4b1a57725]
/lib/x86_64-linux-gnu/libc.so.6(+0x7ff4a)[0x7fa4b1a5ff4a]
/lib/x86_64-linux-gnu/libc.so.6(cfree+0x4c)[0x7fa4b1a63abc]
/usr/lib/x86_64-linux-gnu/libappstream.so.3(as_component_complete+0x439)[0x7fa4b1ddbd19]
/usr/lib/x86_64-linux-gnu/libappstream.so.3(as_data_pool_update+0x44a)[0x7fa4b1ddcf0a]
/usr/lib/x86_64-linux-gnu/libappstream.so.3(as_cache_builder_refresh+0x1c2)[0x7fa4b1dd2272]
appstreamcli(ascli_refresh_cache+0x12e)[0x4049de]
appstreamcli(as_client_run+0x6fb)[0x403ceb]
/lib/x86_64-linux-gnu/libc.so.6(__libc_start_main+0xf0)[0x7fa4b1a00830]
appstreamcli(_start+0x29)[0x403519]
======= Memory map: ========
00400000-00408000 r-xp 00000000 08:01 399024 /usr/bin/appstreamcli
00607000-00608000 r--p 00007000 08:01 399024 /usr/bin/appstreamcli
00608000-00609000 rw-p 00008000 08:01 399024 /usr/bin/appstreamcli
01158000-02d02000 rw-p 00000000 00:00 0 [heap]
7fa4a8000000-7fa4a8021000 rw-p 00000000 00:00 0
バックトレース対応のための設定(かも)
user@ubuntu:~$ sudo apt-get update -ysudo pkill -KILL appstreamcli
user@ubuntu:~$ wget -P /tmp https://launchpad.net/ubuntu/+archive/primary/+files/appstream_0.9.4-1ubuntu1_amd64. deb https://launchpad.net/ubuntu/+archive/primary/+files/libappstream3_0.9.4-1ubuntu1_amd64.deb
user@ubuntu:~$ sudo dpkg -i /tmp/appstream_0.9.4-1ubuntu1_amd64.deb /tmp/libappstream3_0.9.4-1ubuntu1_amd64.deb
user@ubuntu:~$ sudo apt-get update
MySQLインストール
user@ubuntu:~$ sudo apt install mysql-server mysql-client
root用パスワードの入力を求められるので入力する。
MySQLログイン確認とポート番号確認
user@ubuntu:~$ mysql -u root -p
Enter password:          #root用パスワード入力
Welcome to the MySQL monitor. Commands end with ; or \g.
Your MySQL connection id is 4
Server version: 5.7.21-0ubuntu0.16.04.1 (Ubuntu)

Copyright (c) 2000, 2018, Oracle and/or its affiliates. All rights reserved.

Oracle is a registered trademark of Oracle Corporation and/or its
affiliates. Other names may be trademarks of their respective
owners.

Type 'help;' or '\h' for help. Type '\c' to clear the current input statement.

mysql>
mysql> show variables like 'port';
+---------------+-------+
| Variable_name | Value |
+---------------+-------+
| port | 3306 |
+---------------+-------+
1 row in set (0.01 sec)

mysql>
mysql> SELECT user, host FROM mysql.user ORDER BY user, host;
+------------------+-----------+
| user | host |
+------------------+-----------+
| debian-sys-maint | localhost |
| mysql.session | localhost |
| mysql.sys | localhost |
| root | localhost |
+------------------+-----------+
4 rows in set (0.00 sec)

mysql>
MySQL DefectDojo用ユーザ作成
User名:defectdojo パスワード:p@sssw0rd
mysql> GRANT ALL ON `%`.* TO 'defectdojo' IDENTIFIED BY 'p@ssw0rd';
Query OK, 0 rows affected, 1 warning (0.01 sec)

mysql> FLUSH PRIVILEGES;
Query OK, 0 rows affected (0.00 sec)
DefectDojo操作用ユーザーアカウント作成
user@ubuntu:~$ sudo useradd -d /home/dojo -m dojo
user@ubuntu:~$ sudo passwd dojo
user@ubuntu:~$ sudo vi /etc/sudoers

【追加】dojo ALL=(ALL:ALL) ALL
Virtualenvの有効化
Virtualenvインストール
user@ubuntu:~$ sudo pip install virtualenv
ユーザ変更
user@ubuntu:~$ su - dojo
仮想環境の作成
dojo@ubuntu:~$ virtualenv dojo
仮想環境の有効
dojo@ubuntu:~$ source dojo/bin/activate
(dojo) dojo@ubuntu:~$
インストール(django-DefectDojo)
クローン取得(django-DefectDojo)
(dojo) dojo@ubuntu:~$ git clone https://github.com/OWASP/django-DefectDojo.git
Cloning into 'django-DefectDojo'...
remote: Counting objects: 8884, done.
remote: Compressing objects: 100% (40/40), done.
remote: Total 8884 (delta 20), reused 14 (delta 6), pack-reused 8838
Receiving objects: 100% (8884/8884), 17.34 MiB | 3.01 MiB/s, done.
Resolving deltas: 100% (5124/5124), done.
Checking connectivity... done.
(dojo) dojo@ubuntu:~$
ディレクトリ移動
(dojo) dojo@ubuntu:~$ cd django-DefectDojo
(dojo) dojo@ubuntu:~/django-DefectDojo$
セットアップ実行
(dojo) dojo@ubuntu:~/django-DefectDojo$ ./setup.bash
Welcome to DefectDojo! This is a quick script to get you up and running.
Select database type: 1.) MySQL or 2.) Postgres: 1 ###データベースの選択でMySQLの"1"を選択
Setting up database
NEED SUDO PRIVILEGES FOR NEXT STEPS!
Attempting to install required packages...
Installing MySQL client
パッケージリストを読み込んでいます... 完了
依存関係ツリーを作成しています
状態情報を読み取っています... 完了
mysql-server はすでに最新バージョン (5.7.21-0ubuntu0.16.04.1) です。
以下の追加パッケージがインストールされます:
~省略~
★データベース設定登録★
Installing MySQL client
MySQL host: 127.0.0.1 #localhost(127.0.0.1)を入力
MySQL port: 3306 #3306 (前手順で確認した値)で入力
MySQL user (should already exist): defectdojo #defectdojoを入力
Password for user: #defectdojoユーザのパスワードを入力
Database name (should NOT exist): defectdojo #作成するDB名defectdojo
mysqladmin: [Warning] Using a password on the command line interface can be insecure.
Created database defectdojo. ←←←問題ない場合に表示
Leaving Django 1.8.10 requirement
~省略~
★DefectDojo Web管理者アカウント登録★
dojo.Finding.duplicate_list: (fields.W340) null has no effect on ManyToManyField.
Username (leave blank to use 'dojo'): admin #任意のユーザ名を入力
Email address: #Mailを入力 省略可能っぽい
Password: #Passwordを入力
Password (again): #Password(2回目)を入力
Superuser created successfully. ←←←問題ない場合に表示
System check identified some issues:
~省略 ※しばらくインストールが続く~
WARNINGS:
dojo.Finding.duplicate_list: (fields.W340) null has no effect on ManyToManyField.
Installed 1 object(s) from 1 fixture(s)
System check identified some issues:
Copying '/home/dojo/dojo/local/lib/python2.7/site-packages/tastypie_swagger/static/tastypie_swagger/js/lib/jquery.ba-bbq.min.js'
Copying '/home/dojo/dojo/local/lib/python2.7/site-packages/tastypie_swagger/static/tastypie_swagger/js/lib/highlight.7.3.pack.js'
Copying '/home/dojo/dojo/local/lib/python2.7/site-packages/tastypie_swagger/static/tastypie_swagger/js/lib/swagger-oauth.js'
Copying '/home/dojo/dojo/local/lib/python2.7/site-packages/tastypie_swagger/static/tastypie_swagger/js/lib/shred/content.js'
5227 static files copied to '/home/dojo/django-DefectDojo/static'. ←←←問題ない場合に表示 出ない場合は失敗している可能性高い
==============================================================================
SUCCESS! Now edit your settings.py file in the 'dojo' directory to complete the installation.
We suggest you consider changing the following default
DEBUG = True # you should set this to False when you are ready for production.
Uncomment the following lines if you enabled SSL/TLS on your server:
SESSION_COOKIE_SECURE = True
CSRF_COOKIE_SECURE = True
SECURE_PROXY_SSL_HEADER = ('HTTP_X_FORWARDED_PROTO', 'https')
SECURE_SSL_REDIRECT = True
SECURE_BROWSER_XSS_FILTER = True
django.middleware.security.SecurityMiddleware
When you're ready to start the DefectDojo server, type in this directory:
python manage.py runserver
(dojo) dojo@ubuntu:~/django-DefectDojo$
Backtraceyやパッケージインストールエラーなどが出る場合は、対象のパッケージをインストール後に再度実施すると上手いこと進むかも。
#dockerコンテナバージョンは何かが不足している状態で完了したため、インストール後は正常にGUI画面が表示されない。
#コンテナ内でパッケージ追加で対応できるがめんどくさい。
起動準備のためのインストール
Uwsgiインストール
(dojo) dojo@ubuntu:~/django-DefectDojo$ pip install uwsgi
Uwsgiimagekit追加
(dojo) dojo@ubuntu:~/django-DefectDojo$ pip install django-imagekit
(dojo) dojo@ubuntu:~/django-DefectDojo$ pip install pillow --upgrade
settings.py修正
(dojo) dojo@ubuntu:~/django-DefectDojo$ vi ./dojo/settings.py
-------------
(修正前)DEBUG = True
↓
(修正後)DEBUG = False
-------------
(修正前)ALLOWED_HOSTS = []
↓
(修正後)ALLOWED_HOSTS = [u'192.168.20.170'] #接続する端末のアドレスを入力 ※セグメントでも記載は可能かも。
-------------
DefectDojo起動
起動用ファイル"run_dojo.bash"の内容
緑文字のコマンドを使用する
(dojo) dojo@ubuntu:~/django-DefectDojo$ more run_dojo.bash
------------
#!/bin/bash
function control_c()
# run if user hits control-c
{
kill -15 $cpid $bpid $ppid
exit $?
}
trap 'control_c' SIGINT
celery -A dojo worker -l info --concurrency 3 &
cpid=$!
celery beat -A dojo -l info &
bpid=$!
python manage.py runserver &
ppid=$!
tail -f /dev/null
------------
DefectDojo起動
django-DefectDojoディレクトリで実行すること
(dojo) dojo@ubuntu:~/django-DefectDojo$ celery -A dojo worker -l info --concurrency 3 &
[1] 21897
(dojo) dojo@ubuntu:~/django-DefectDojo$
(dojo) dojo@ubuntu:~/django-DefectDojo$
-------------- celery@ubuntu v4.1.0 (latentcall)
---- **** -----
--- * *** * -- Linux-4.4.0-21-generic-x86_64-with-Ubuntu-16.04-xenial 2018-01-23 07:21:29
-- * - **** ---
- ** ---------- [config]
- ** ---------- .> app: dojo:0x7fd2804aefd0
- ** ---------- .> transport: sqla+sqlite:///dojo.celerydb.sqlite
- ** ---------- .> results: disabled://
- *** --- * --- .> concurrency: 3 (prefork)
-- ******* ---- .> task events: OFF (enable -E to monitor tasks in this worker)
--- ***** -----
-------------- [queues]
.> celery exchange=celery(direct) key=celery
[tasks]
. add comment
. add_epic_task
. add_issue_task
. async_dedupe
. async_false_history
. close_epic_task
. dojo.celery.debug_task
. dojo.tasks.add_alerts
. dojo.tasks.async_custom_pdf_report
. dojo.tasks.async_dupe_delete
. dojo.tasks.async_pdf_report
. imagekit.cachefiles.backends._generate_file
. update_epic_task
. update_issue_task
[2018-01-23 07:21:30,025: INFO/MainProcess] Connected to sqla+sqlite:///dojo.celerydb.sqlite
[2018-01-23 07:21:30,099: INFO/MainProcess] celery@ubuntu ready.
(dojo) dojo@ubuntu:~/django-DefectDojo$
(dojo) dojo@ubuntu:~/django-DefectDojo$ celery beat -A dojo -l info &
[2] 21943
(dojo) dojo@ubuntu:~/django-DefectDojo$ celery beat v4.1.0 (latentcall) is starting.
__ - ... __ - _
LocalTime -> 2018-01-23 07:22:07
Configuration ->
. broker -> sqla+sqlite:///dojo.celerydb.sqlite
. loader -> celery.loaders.app.AppLoader
. scheduler -> celery.beat.PersistentScheduler
. db -> /home/dojo/django-DefectDojo/dojo/dojo.celery.beat.db
. logfile -> [stderr]@%INFO
. maxinterval -> 5.00 minutes (300s)
[2018-01-23 07:22:07,939: INFO/MainProcess] beat: Starting...
(dojo) dojo@ubuntu:~/django-DefectDojo$
Uwsgiを起動
localhost:8001を使う。
(dojo) dojo@ubuntu:~/django-DefectDojo$ uwsgi --socket 127.0.0.1:8001 --wsgi-file wsgi.py --workers 7 &
[3] 21983
(dojo) dojo@ubuntu:~/django-DefectDojo$ *** Starting uWSGI 2.0.15 (64bit) on [Tue Jan 23 05:22:53 2018] ***
compiled with version: 5.3.1 20160413 on 23 January 2018 05:07:30
os: Linux-4.4.0-21-generic #37-Ubuntu SMP Mon Apr 18 18:33:37 UTC 2016
nodename: ubuntu
machine: x86_64
clock source: unix
detected number of CPU cores: 1
current working directory: /home/dojo/django-DefectDojo
detected binary path: /home/dojo/dojo/bin/uwsgi
!!! no internal routing support, rebuild with pcre support !!!
*** WARNING: you are running uWSGI without its master process manager ***
your processes number limit is 3749
your memory page size is 4096 bytes
detected max file descriptor number: 1024
~ 省略 ~
*** Operational MODE: preforking ***
WSGI app 0 (mountpoint='') ready in 1 seconds on interpreter 0x1b4bde0 pid: 21983 (default app)
*** uWSGI is running in multiple interpreter mode ***
spawned uWSGI worker 1 (pid: 21983, cores: 1)
spawned uWSGI worker 2 (pid: 21987, cores: 1)
spawned uWSGI worker 3 (pid: 21988, cores: 1)
spawned uWSGI worker 4 (pid: 21989, cores: 1)
spawned uWSGI worker 5 (pid: 21990, cores: 1)
spawned uWSGI worker 6 (pid: 21991, cores: 1)
spawned uWSGI worker 7 (pid: 21992, cores: 1)
(dojo) dojo@ubuntu:~/django-DefectDojo$
NGINX連携
#本来はHTTPSでのアクセス可能とするべきだが、NGINXの設定がよくわからないのでHTTPでのアクセスする設定とした。
NGINXインストール
(dojo) dojo@ubuntu:~/django-DefectDojo$ sudo apt-get install -y nginx
Nginx設定
Webでhttp://xx.xx.xx.xx:8888 -> http://localhost:8001 に繋いでくれてるはず。
※※site-availableディレクトリに設定ファイルを置いてシンボリックリンクをsites-enabledに作ると階層が多すぎるとかでアクセスできないらしい
(dojo) dojo@ubuntu:~/django-DefectDojo$ cd /etc/nginx/sites-enabled/
(dojo) dojo@ubuntu:/etc/nginx/sites-enabled$ sudo vi defectdojo.conf
-------------
upstream django {
server 127.0.0.1:8001; #Uwsgiで指定したポート番号
}
server {
listen 8888; #Webアクセスする際のポート番号
server_name moniter;
client_max_body_size 500m;
location /static/ {
alias /home/dojo/django-DefectDojo/static/;
}
location /media/ {
alias /home/dojo/django-DefectDojo/media/;
}
location / {
uwsgi_pass django;
include /home/dojo/django-DefectDojo/wsgi_params;
}
}
defaultファイルの移動(削除)
(dojo) dojo@ubuntu:/etc/nginx/sites-available$ sudo mv default /usr/backup/nginx_sites-available_default
(dojo) dojo@ubuntu:/etc/nginx/sites-enabled$ sudo rm default
NGINX起動
(dojo) dojo@ubuntu:/etc/nginx/sites-enabled$ sudo nginx -s stop
(dojo) dojo@ubuntu:/etc/nginx/sites-enabled$ sudo nginx
ブラウザでアクセス確認
アクセスURL : http://192.168.20.170:8888
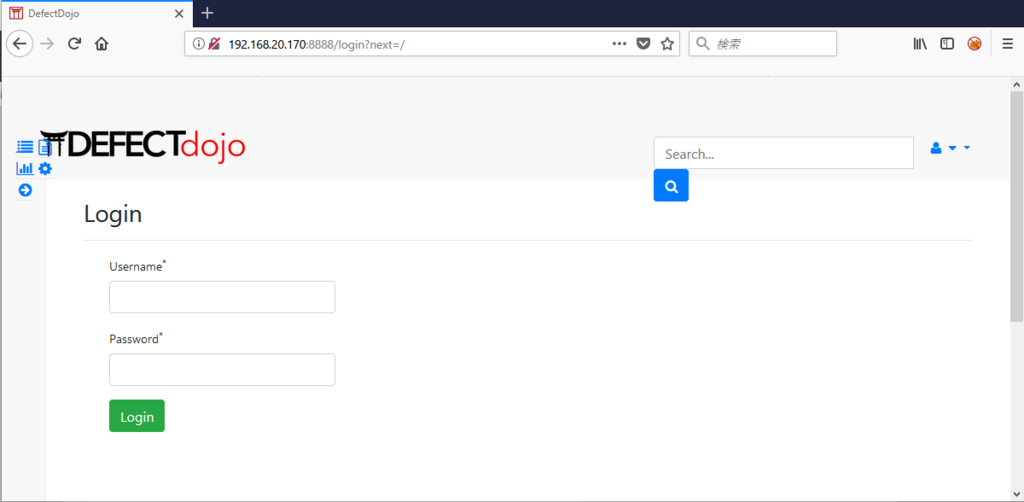
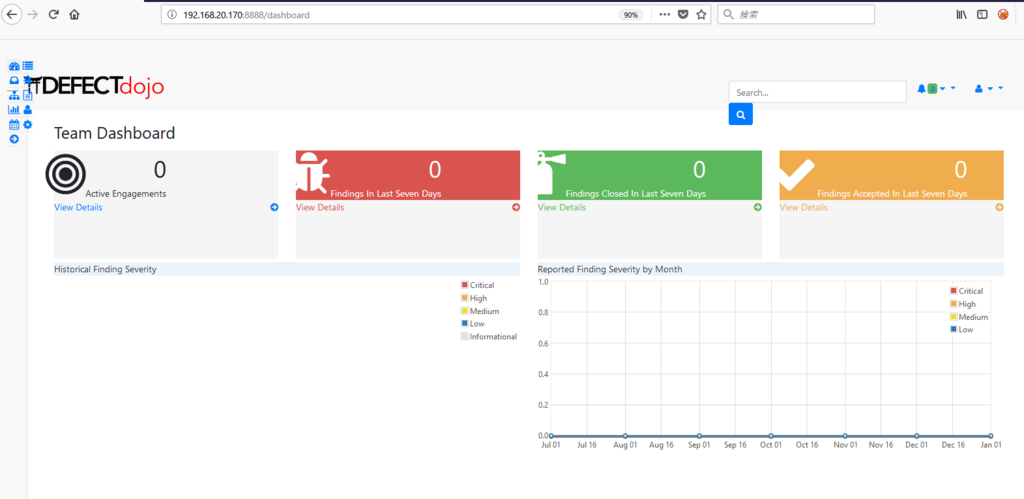
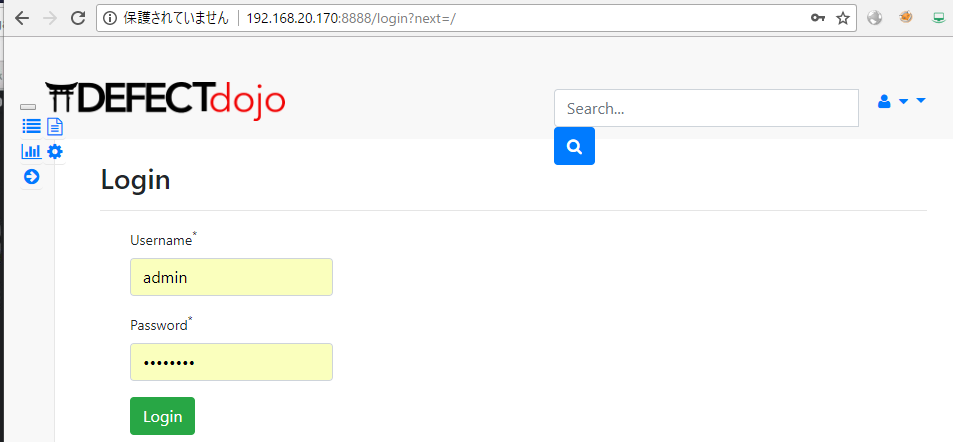
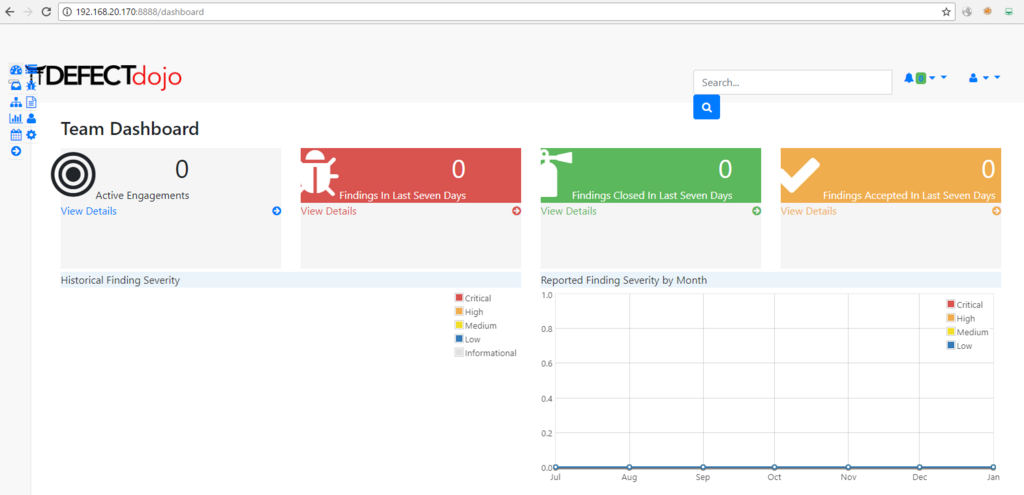
一応表示されるがレイアウトが崩れている。それにブラウザ毎で表示が若干ちがってるが原因はよくわかりません
●firefox
ログイン画面

ログイン後のトップページ

●chrome
ログイン画面

ログイン後のトップページ
